
Nail art is a complete art of creativity. The special splashing of magical colors on the nail adds to its beauty and it is the desired fantasy work for many. When creative ideas coalesce with easy tricks, one can create exquisite nail art designs. In this article, we will explore the easy tips & tricks to create a range of pleasant and gorgeous nail designs with nail paints or nail polish.
Shapes of Nails
Generally, there are different shapes of the nail, where we can shape the nail according to our favorite style. The following are the famous nail shapes widely used across the world.
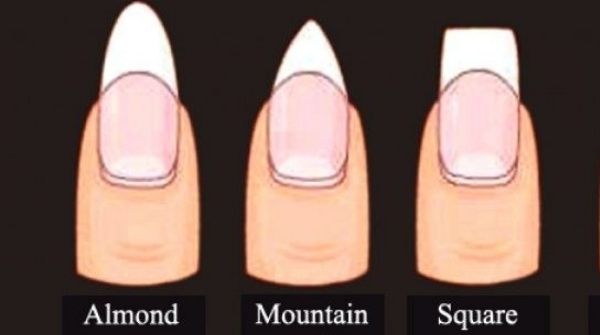
Almond nail, Mountain peak nail, Square nail, Rounded nail, Squarely nail, and Oval nail. Shaping the nails always add a good basement for nail art.

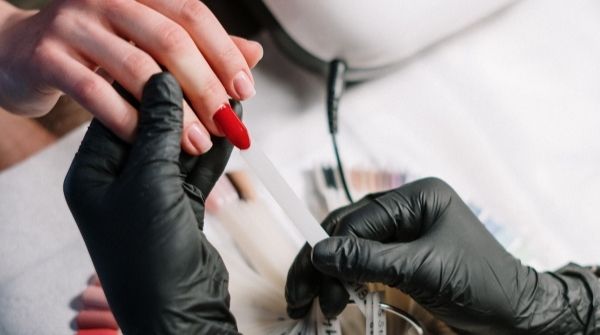
Manicure:

In general, a manicure is a good refreshing treatment for hands and nails. It helps to remove the dead skin cells from the nail and will soften the skin. Many types of manicures that are done at salons; Basic manicure, Gel manicure, French manicure, American manicure, Reversed French manicure, Shellac manicure, paraffin manicure, Dip powder manicure, Acrylic overlay manicure, Hot stone. Each manicure has its unique characteristics and all techniques will vary from each other.
Simple tips and tricks for nail art
Some people will have a nail-biting practice and the nails will be grown in an un-uniform structure automatically. For some people, nails will not have enough growth, so there is an option available for them is, they can use a fake artificial nail and stick on their nail. Using artificial nails with elegant art design is always beneficial and trending. You can customize the nail art design according to your wish.
Attractive simple designs
There are many simple and easy techniques available for nail art designs. For example, nail polish designs such as floral, heart, musical notes, taxi color print, bees, panda, penguins, plants, fruits, little sparkles, dual-color, geometric shapes, Chevron, etc. will be easier and attractive.

Simple tips & tricks
They are many wide options are available for short nails. For example, using stripes design with contrast colors in the nail will make it interesting. If you are going to use more than one nail paint, you should give time to set dry otherwise, it will be collapsed. Moreover, before using any nail polish or nail paint designs first check the colors which you choose is suit to the skin tone and this will give a better result. A basic coat should be done before nail polish or nail paint because it will help to protect the natural nails. After finishing nail art, you should apply a top coat which will help to protect the nail art designs.
You can also add the glitter nail paints for the shinny and glittering effect. Normally, detailed art designs will be complicated for short nails and it will look messy. Before doing nail polish or nail paint design try to do a manicure, which will give better results. Try to put scotch tape or liquid latex around the nails, before doing the nail art, because it will help to protect and will be easy to take off the colors around the nails.
Materials needed for nail art design
With many household objects, you can create easy elegant designs. Nail paint design can be done with household items like toothpicks, hairpins, buds, etc., can use for nail art design. The following are the ingredients used for all the type of nail art. They are base coat, nail stones, stencils, stickers and decals, stamping kit, manicure tweezers, nail art tape, acrylic nail paints, manicure pen, dotting tool, stripes stickers, makeup sponge, nail brushes, acetone or nail polish remover, scotch tape, liquid latex, nail polish with various colors, glitter nail polish of multiple colors, tissue paper, cotton, pallet, matte topcoat for shiny and topcoat is for the protective layer.
Easy and simple techniques for nail art designs
There are many easy and simple techniques where you can do at your home itself. The following are the different types of nail art techniques that result in attractive beautiful designs. They are French manicure, Reverse French manicure, stripes design, tie-dye design, stencil design, ombre or gradient design, polka dot designs, Stickers, and decal designs, Stamping nail design, Splatter nail design, Stud based design.
French manicure:
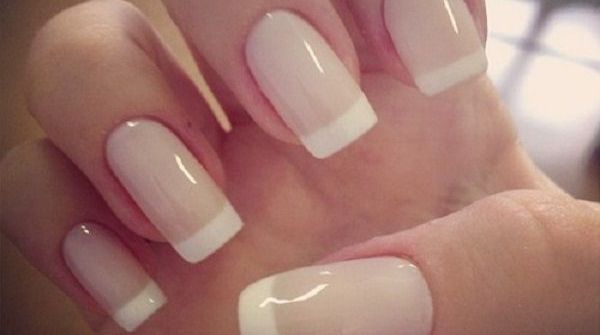
In this technique, the base color will be nude shaded nail color and the tips of the nail will be coated with white color. The materials needed for this technique are nude shaded color, white nail polish, base coat, tape, and topcoat. Firstly, apply nude polish in the nail and make it dry. Then you can apply the tape, rest than the tip of the nails. Now you coat the nail tips with white color and make it dry well. Finally, you should use a top coat for the protection of the nail colors and you can also use a manicure pen for white color coating.
Reverse French manicure:

In this technique, the base nail color can be nudely shaded or any kind of color and the lower part of the nail will be coated with any color. The materials needed for this technique are nude shaded color, white nail polish, contrast colors, base coat, tape, and topcoat. Another way is you can also fill the base color and lower part of the nails with any two contrast colors. In this technique, you should cover the part of the nails with tape except for the lower part of the nail. Make it dry well and at last apply the top coat for protection of the nail colors.
Stripes nail art design

Here this technique will be based on the striping tapes and stripes nail art will contain dual-color which is the base color and the other is contrast color. The materials needed for this technique are base colors, stripes, manicure tweezers, contrast colors, base coat, tape, and topcoat. There are stripes available in the shop or else you can also make stripes on your own itself. There are two kinds of art you can implement in this stripe; one type is you can stick stripes in your nail itself, and another type is you can use the stripes and peel it off. You can make horizontal as well as vertical strikes according to your wish.
I. First method:
Firstly, you coat the base color in the nail and after that, you should apply the topcoat and let it dry. Then stick the cut stripes carefully according to your desired patterns. Again you apply the second contrast color to the nail. Now quickly peel of these stripes with tweezers and very carefully, without disturbing the color, and then make it dry. In case if you have done any mistakes, you can touch up with a thin brush carefully. At last, you should apply the topcoat in the nail and make it dry well.
II. Second method:
If you are not confident in the first method, then you can stick the stripes stickers in your nail. Firstly, apply your base color in the nail and then apply the topcoat and make it dry. Take the stripe stickers in the contrast color of your base color and cut it into small pieces. Then stick over the nail according to your desired pattern. Now apply top coat all over the nail and make it dry completely.
Tie-dye nail art design

A very attractive tie-dye nail art design can be done with the help of sponges or brush, toothpick, etc. Using this nail paint design, you can do the brush/ sponge technique and water marble technique.
Brush / sponge technique:

We are going to see how to use sponge/brushes for tie-dye design. The main materials needed here are sponges, nail brushes, two or more nail contrast colors, a base coat, blooming gel, and the neutral base color. Firstly, apply a base coat in nails and make it dry and apply the neutral base color and let it dry. Now you should apply blooming gel over the base color. Then take a nail brush and take two contrast colors in the pallet and dip the brush with colors together and paint it in the nail. So the colors will start to bloom and after getting dry you apply the topcoat and make it dry again. The same technique you can do with a sponge.
Water marble technique:
An important tip for this marble design is that you should work quickly before the nail polish color dries. Materials needed for this method is filtered water or bottled water at room temperature and new nail polish colors used for marble technique, Scotch tape or liquid latex, a toothpick, flat brush. In this technique, don’t use cold or hot water. Room temperature filtered water will help to spread the polish color in the nail properly and quickly. Firstly, apply the base coat in the nail and make it dry. Then apply two coats of base neutral color and let it dry. Now stick the scotch tape or apply liquid latex around the nails.

Now take a small cup of water and drop each color in the center of the water one by one quickly. Always use nail colors that are new and branded and then take a toothpick and drag a line from outside of the ring towards the center in the colored water very quickly. Don’t do it very slowly, because it will make a mess. Now make a dip your nails one by one in the colored water and slowly take out your nails from the water and make it dry. Then peel off the scotch tape or peel the color from the liquid latex area and finally apply the topcoat in your nails and make it dry.
Ombre or gradient nail art design
Ombre nails will always contain two contrast colors or the same shades of color. Materials needed for the gradient technique is a sponge, plastic sheet, base coat, shades of nail polish colors, scotch tape or latex liquid, topcoat, toothpick. Firstly, apply a base coat and make it dry. Apply your base color according to your need and make it dry and then apply liquid latex or stick the scotch tape around the nails to protect your skin. Take a plastic sheet and apply two contrast or two shades of the same color in the sheet.

Mainly the middle layer of the colors should be blended properly and you can use the toothpick for blending. Now take that sponge and dab the sheet gently and dab it on your nail and make a dry of that layer for a minute. Now repeat these same steps 2 to 3 times carefully until you get perfect results and then you can remove the latex liquid or tape from the skin and clean up the excess polish by the brush with the help of the nail remover. Finally, you coat with the topcoat and make it dry.
Polka dot nail art design
A very easy simple nail polish design is doing polka dot designs. With these polka dots, you can create simple floral designs. Different combinations of nail paint designs will be very attractive. The materials needed for this design is a base coat, two types of contrast colors, a topcoat, and dotted tools. If dotted tools are not available you can use the hairpin end, toothpick, or buds.

Firstly, make a base coat in your nail and make it dry and then apply your base colors and let it dry. Now apply its contrast color and make a pattern or design of your desired wish and at last, apply the topcoat and make it dry.
Stickers and decals nail art design
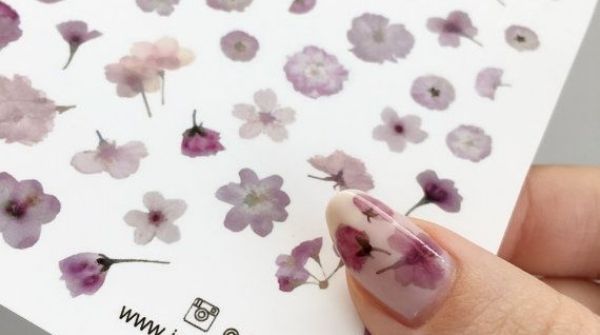
The stickers and decals are readymades and it is available at the shops. The materials needed for this technique is a base coat, manicure tweezers, stickers, topcoat, base color. Firstly, you apply a base coat on your nail and let it dry. Then apply the base color to the nail and make it dry and now you choose one sticker and using tweezers take carefully and place on your nail slowly and finally, apply the topcoat and make it dry.
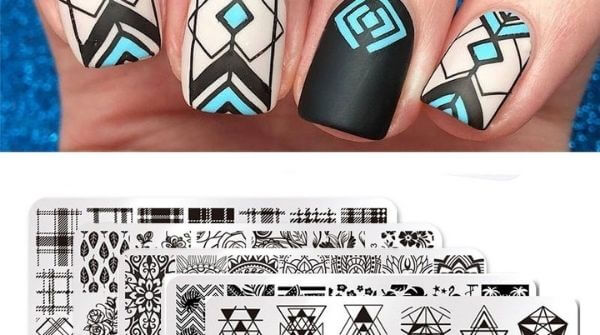
Stamp nail art design
This technique helps to transfer the designs on your nails using a nail stamp. Material needed for this technique is a stamping kit, base coat, base color, contrast color to the base color, topcoat, acetone or nail remover, cotton. This kit includes stamper, stamping metal plates that contain designs, scrapers and you can use regular nail polish or stamping polish also available in the shops. Firstly, apply the base coat on your nail and make it dry. Then apply a base color to your nail and let it dry and now take any contrast color and apply on the design in metal stamping plate. Hold your plate in 45 degrees and scrape the plate in one direction.
This should be done for one time with the scrapper and following which, gently remove the excess of nail polish. Now keep the squishy part of the stamper on the design to make a transfer by up and down method. Then keep the stamp print on your nails. Remove and clean the excess prints outside of the nail with the help of nail remover or acetone and after that put topcoat on your nails and make it dry and if anything goes wrong, you can remove it with the nail remover. Make sure the design plates, stamper, scratcher are always clean after every single use.
Stencil nail art design
Using stencil you can make easy and simple nail art designs. The materials needed for this technique are two contrast colors, base coat, nail vinyl stencils, sponge, scissors, and topcoat.
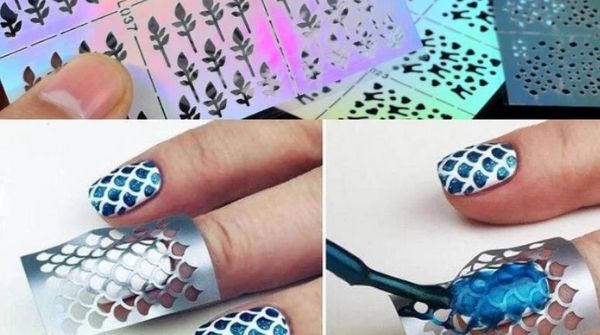
Firstly, apply the base coat on the nail and then choose one of the colors as a base color and apply it on the nail and make it dry. Apply top coat and make it dry and then place the stencil over the nail properly and cut the extra sides of the stencils and press it on the sides of the nail very firmly. Apply the other color of the polish over the makeup sponge and now dap the colored sponge slowly on the stencil. Another way is to apply directly nail polish on the stencil and then remove the stencil gently. Finally, apply the top coat for protection.
Splatter nail art design
This technique is splattering the different nail polish colors on the nails and it is one of the trendy nail polish designs widely used. The materials needed for this technique are a base coat, neutral base colors, vibrant contrast colors, topcoat, straws, scissors, pallet, scotch tape, or liquid latex. Firstly, apply the base coat on the nail and then apply the neutral base color on the nail. For example, white color will be good for the base color and apply liquid latex or stick the scotch tape around your nails to avoid a mess.

Now choose one nail polish color and drop big blobs on the pallet and take a scoop the color on the straw. The main tip is that you should not dip in the color and after taking the color and keep the straw vertical. Then keep your straw on the top and blow hard over the nail and now the color will be splattered in the nail well. Try the same steps with the other colors in your nail and finally, apply the topcoat to the nail, and make it dry. You can cut the straws and reuse it.
Stud nail art design
This technique is based fully based on sticking the glittering studs on the nail. The materials needed for this technique are different types of nail studs, base coat, base neutral color, any type of colors, topcoat, tweezers or dotted tool, nail glue.

Firstly, apply the base coat and make it dry. Apply the base color on the nail and let it dry and again apply top coat on the nail and make it dry. Now take the dotted tool and make a dip in nail glue and take the stones one by one and keep it on the nail gently. At finally you should add the top coat and make it dry
FAQs regarding Nail Art Design
No, topcoat and base coat are different products. The base coat should be applied first before putting nail polish. It is used for protecting the natural nails. Topcoat will apply after nail polish. It is applied for the protection of nail polish or nail paint.
The acrylic nail and gel nails are artificial nails. Acrylic nails are a combination of liquid monomer & powder polymer which will be cured together and form a dough. Then it is shaped with the brush and air-dried. The readymade gel will be applied to the nails. Then gel will be cured under UV OR LED light. Gel nails are more glossy when compared to acrylic nails.
Editor’s note | Nail Art Designs
In past days, nail art is not that much popular, but nowadays there is a separate salon for nail treatment. In addition to skin care, hair care, manicure are also more important to follow regularly. Manicure helps in removing the dead skin cells from the nail areas. Nail paint design or nail polish design is trending more in our day to day lifestyle and it is one of the mandatory fashionable accessories in our day to day life. So in this article, we explored many nails paint designs and nail art techniques that we can do it in the home itself.
Some peoples have a deficiency in nail growth and the way to solve this problem is having good immune rich foods daily. People also have a habit of nail-biting, because of this, there will be no proper growth for nails. In this case, you can use fake artificial nails and do nail paint or nail polish designs and stick that fake nails to your original nails and start to flaunt the nails with elegant designs.